My setup: from a servo torch to a self-contained camp
Personal experience. These are my own setup, my own figures and my own lessons, not tests of any product.
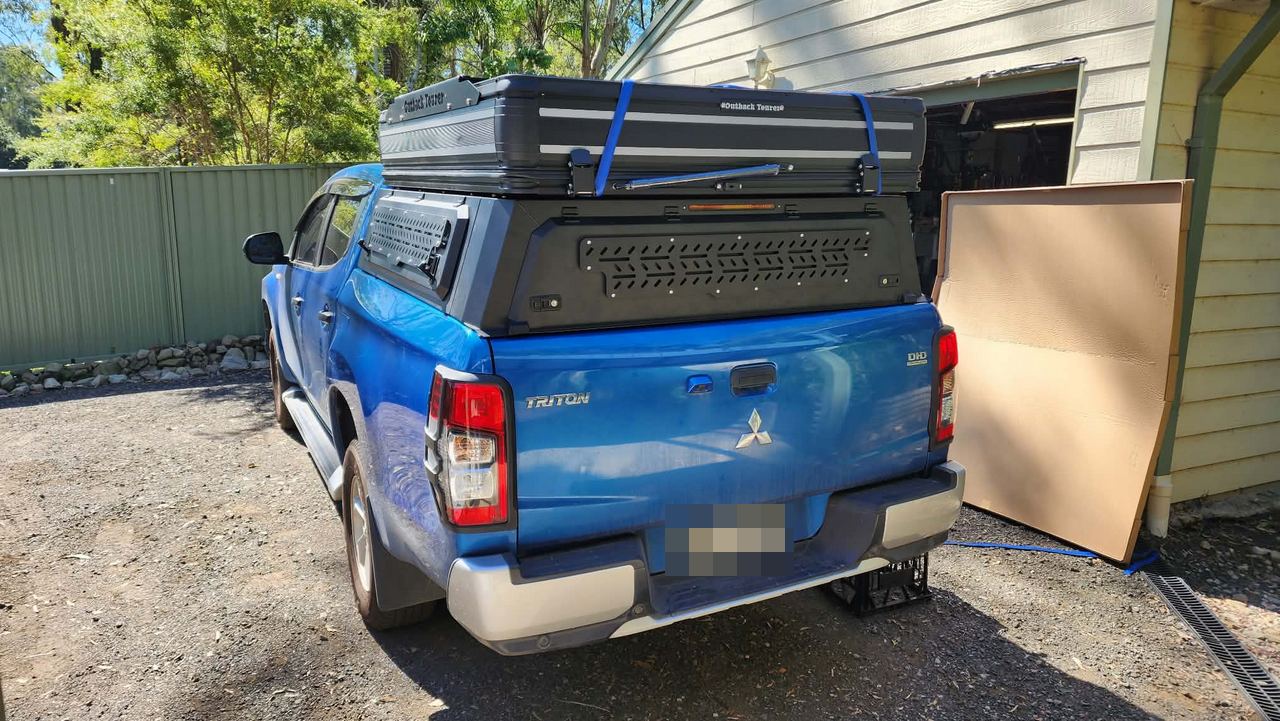
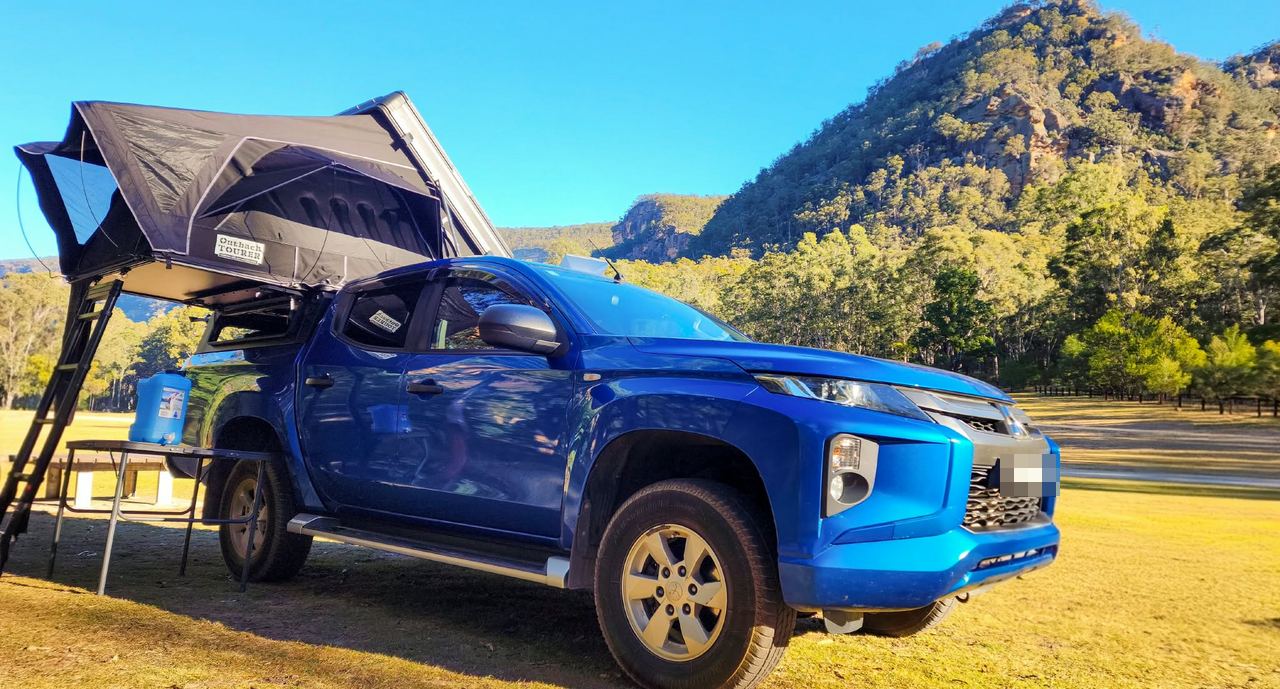
My setup is built around a 2019 Mitsubishi Triton GLX+, fitted with a low-profile TRADECAP canopy and an Outback Tourer 1.5 rooftop tent. The canopy carries the auxiliary electrical system, fridge, communications and camping equipment. The vehicle also carries the recovery and fossicking equipment needed for the sort of places I travel to.
I've gradually modified the Triton around that use rather than simply fitting accessories for appearance. That includes changes to the suspension to better manage the additional touring load, along with upgrades aimed at reliability and making the vehicle more suitable for corrugations, dirt roads and extended travel.
Where I started
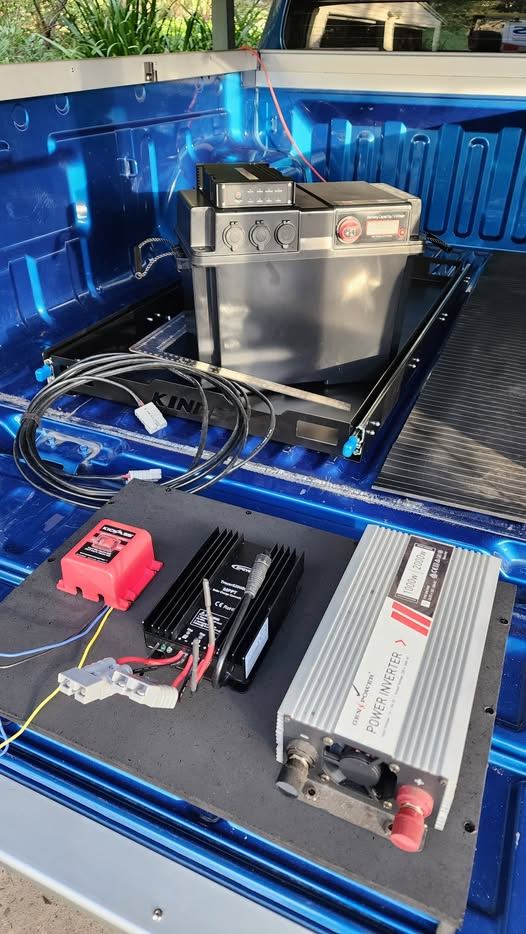
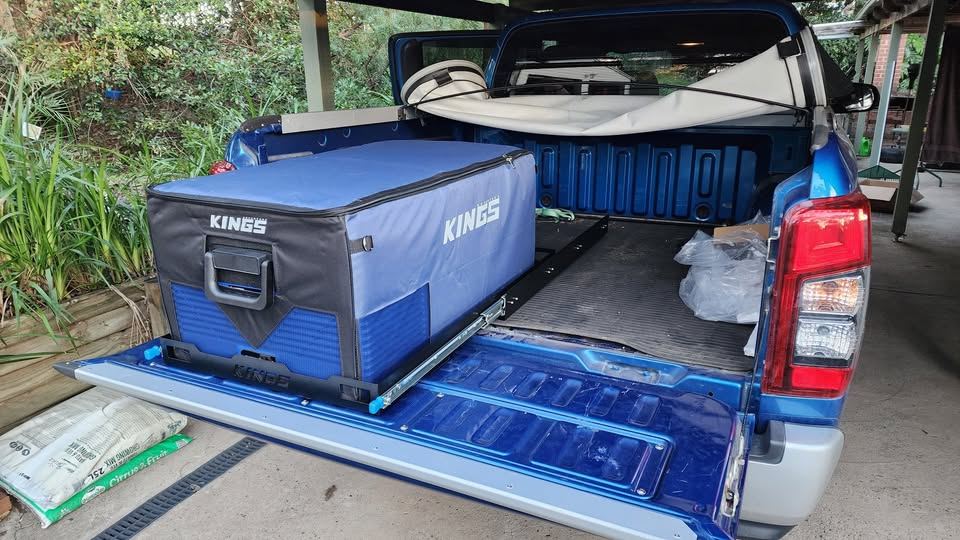
When I first started travelling and camping, my setup was very basic. I had a fridge mounted on a drawer that fitted underneath the tonneau cover on the Triton and a simple 160Ah lithium battery. The battery was in a box with a solar Anderson input for my solar blanket and an Anderson output that powered the fridge. It also had a cigarette/accessory socket, which I used to power Starlink.
It worked, but I really didn't know yet what I needed, how I was going to use everything or what would become important to me after spending more time travelling.
One of my biggest mistakes was mounting the battery at the front of the ute tub. Once the fridge and the rest of the gear were loaded, the battery was behind everything and accessing it was a massive pain in the arse. Storage was very limited, connections were difficult to get to and everything was harder to use than it needed to be.
It wasn't really the equipment that was the problem. It was my poor design and lack of experience at the time. I simply hadn't travelled enough yet to know what I wanted.
The K'gari (Fraser Island) lesson
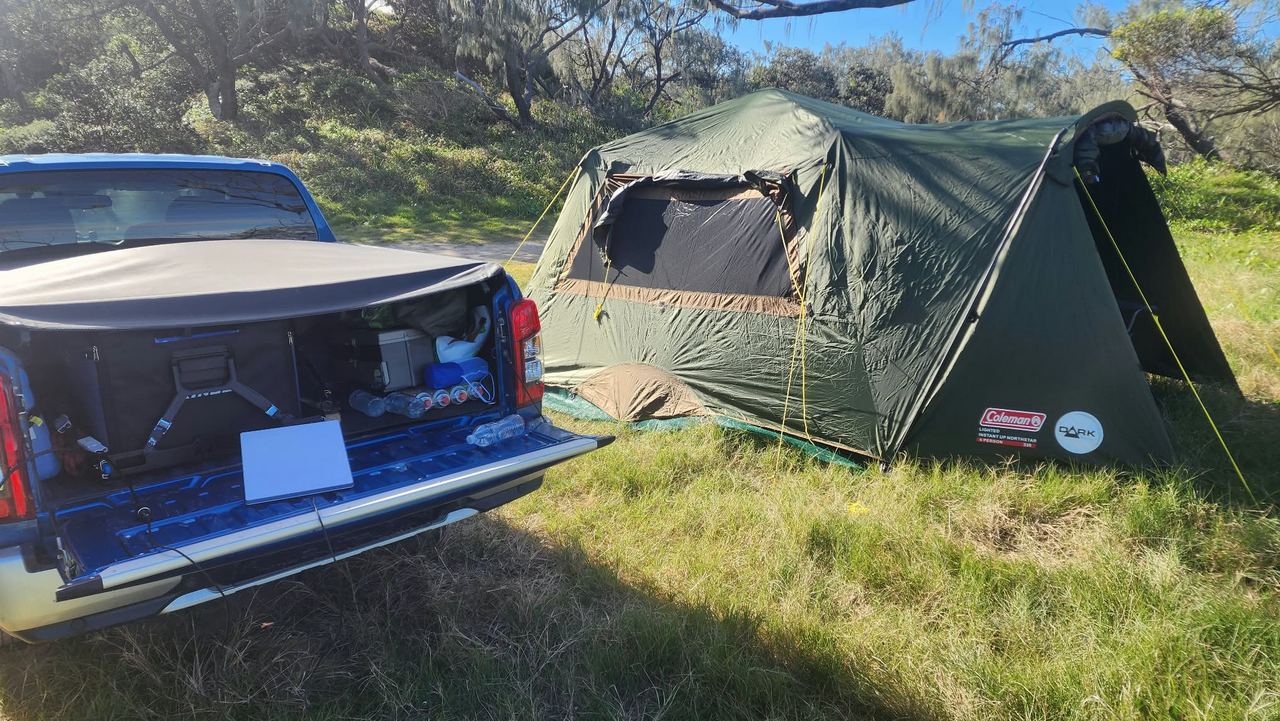
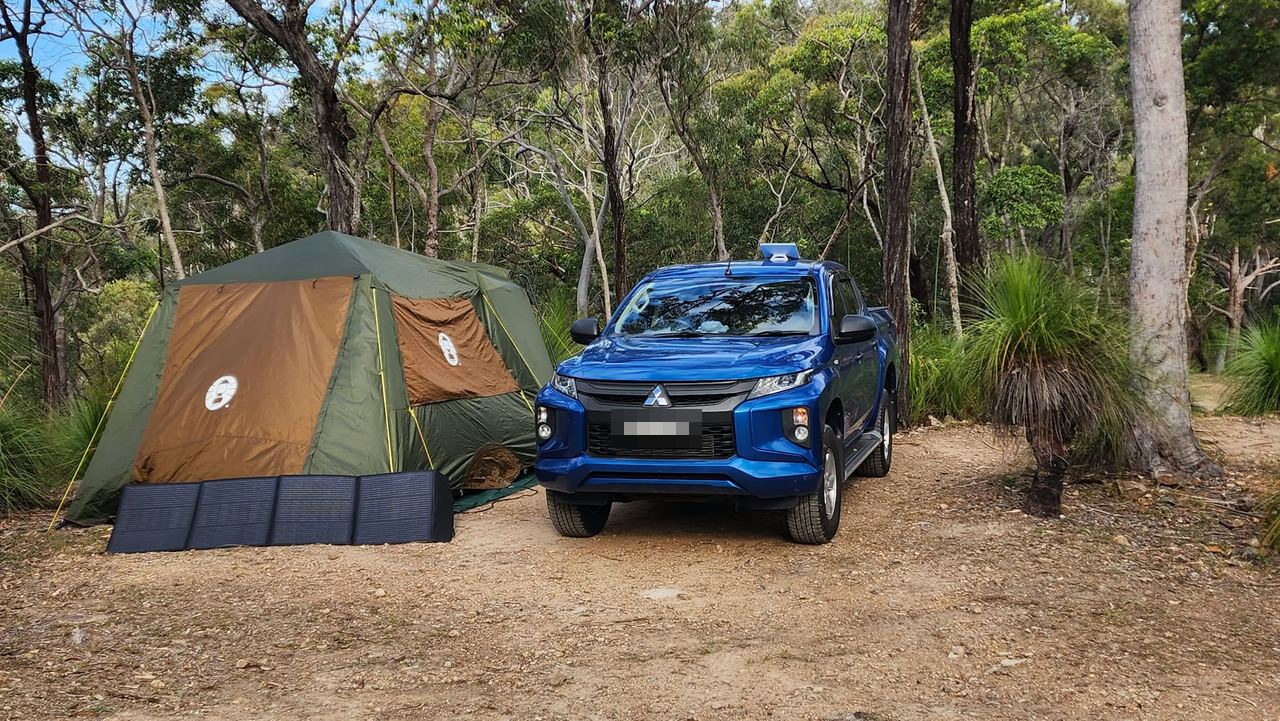
One of the best lessons came from one of my earlier, very under-equipped trips to K'gari (Fraser Island). At the time I was running Starlink through the inverter. For some reason I thought that was a good idea.
What I didn't properly appreciate then was that the inverter itself consumed additional power, even when it wasn't doing much. I woke up at about 2am to the auxiliary battery beeping because the battery level had dropped too low. The BMS protection kicked in and shut things down.
Then I had another problem: I couldn't get the battery to start accepting charge again. For a while I genuinely thought I might have to finish the trip early because without the auxiliary battery I was going to have trouble keeping everything running.
Ironically, praise Odin for Starlink. Having internet access meant I could Google possible fixes from where I was and eventually work out how to trick the battery into accepting charge again.
That experience taught me several things at once:
- Don't use an inverter to convert 12V power to 240V unnecessarily when the equipment can be powered directly and more efficiently from the DC system.
- Understand the idle consumption of equipment, not just what the main appliance uses.
- Understand what the BMS will do when the battery gets too low.
- Build the system so that if something does go wrong, you can actually access and manage it.
My current setup takes those lessons into account.
What I changed and why
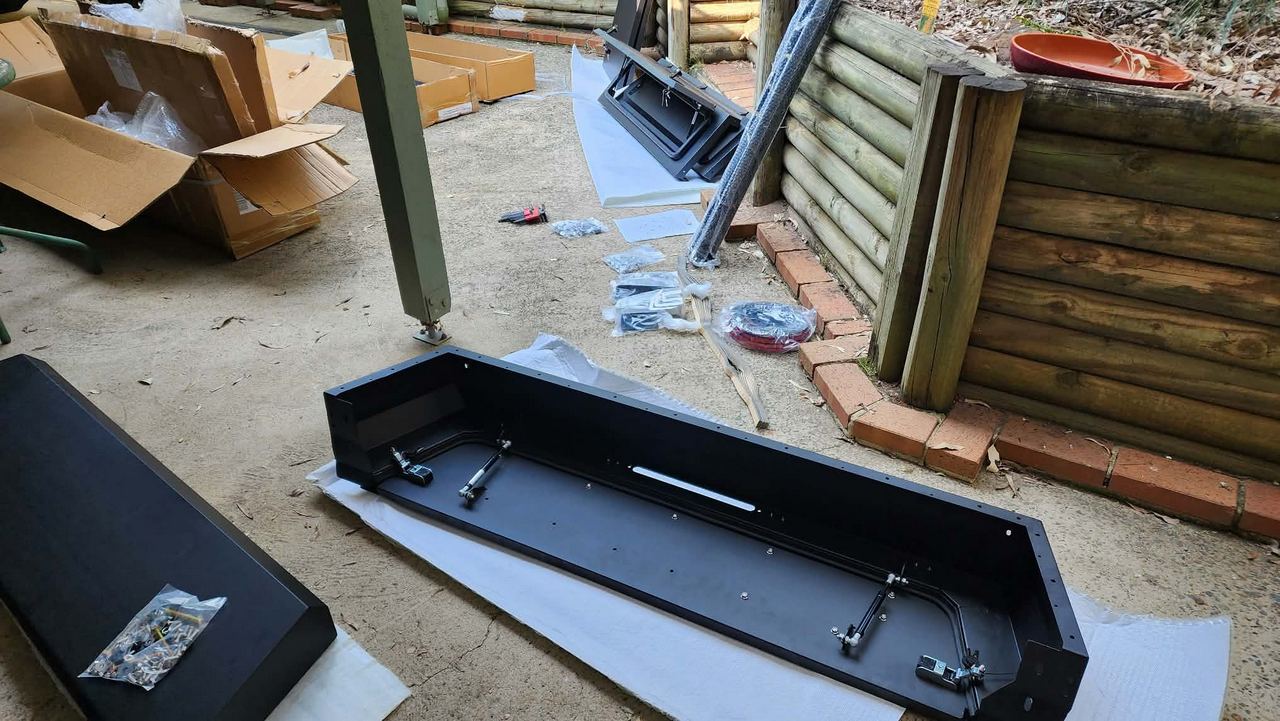
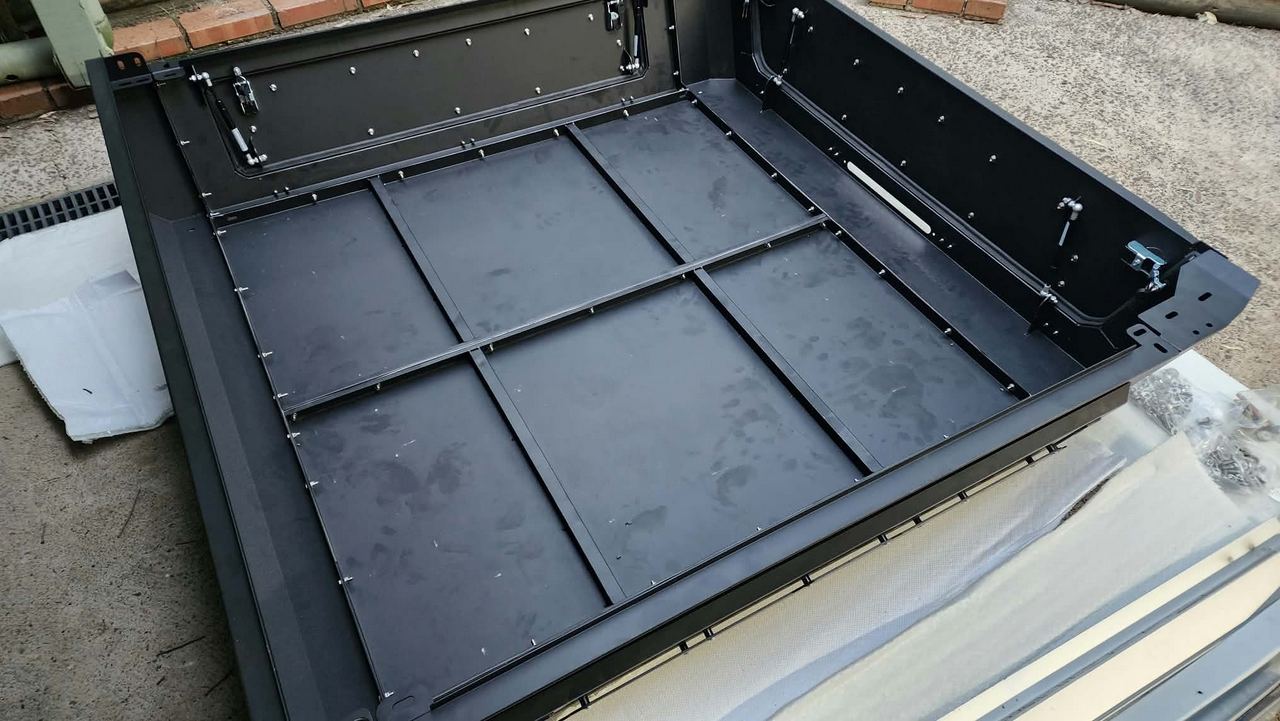
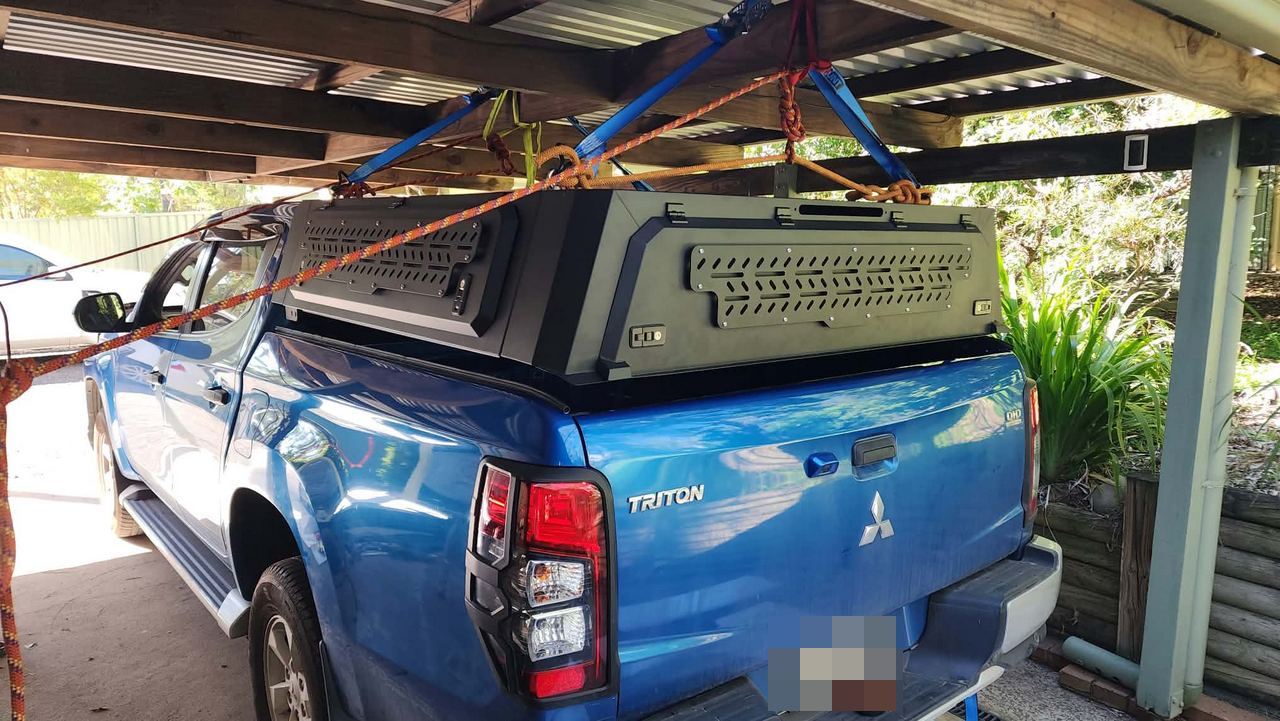
The biggest lesson from that first setup was accessibility and ease of use.
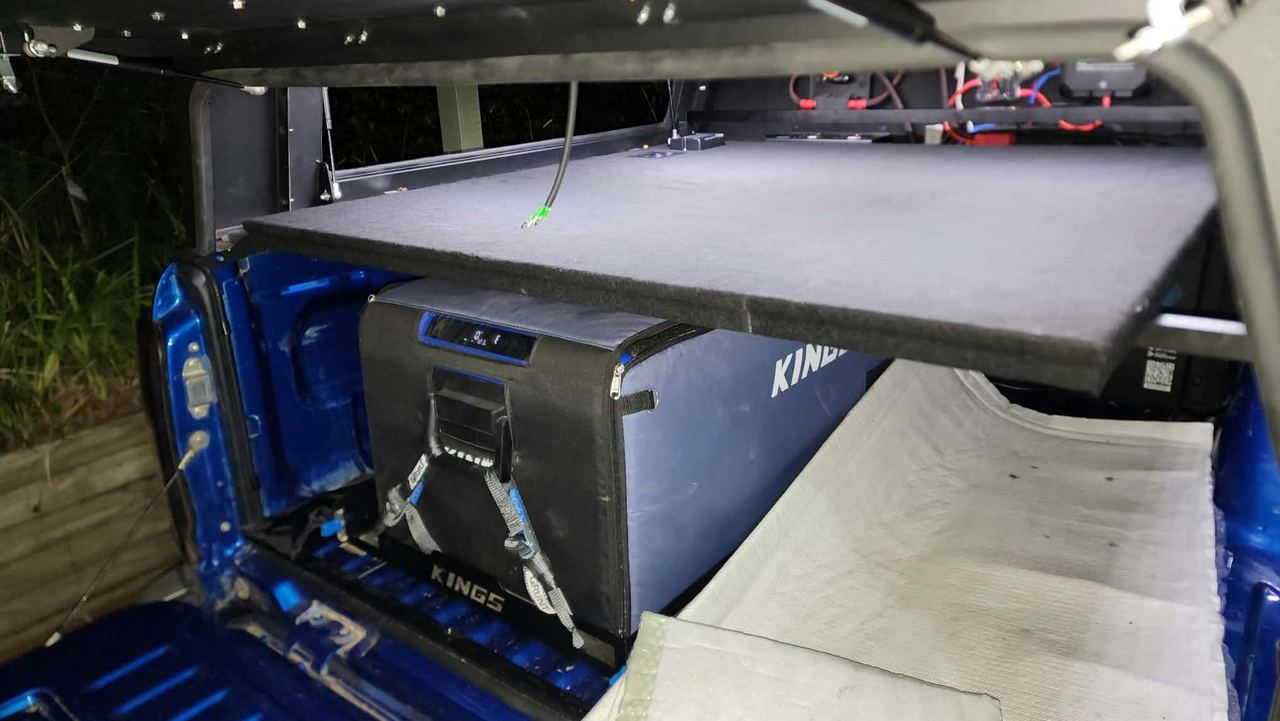
When I moved to the canopy setup, I added a false floor above the fridge. That gave me a tonne more usable storage and also gave me somewhere sensible to build the new electrical setup. That false floor meant I could position inputs, outputs, switches and connections where I could actually reach them.
Instead of having important equipment buried behind the fridge and camping gear, the new setup was designed around how I actually use it at camp.
That's probably the biggest thing I'd change if I were starting again: think about accessibility before worrying about making everything fit. Something can work perfectly electrically and still be a terrible setup if you have to unload half the vehicle every time you need to reach it.
The power system
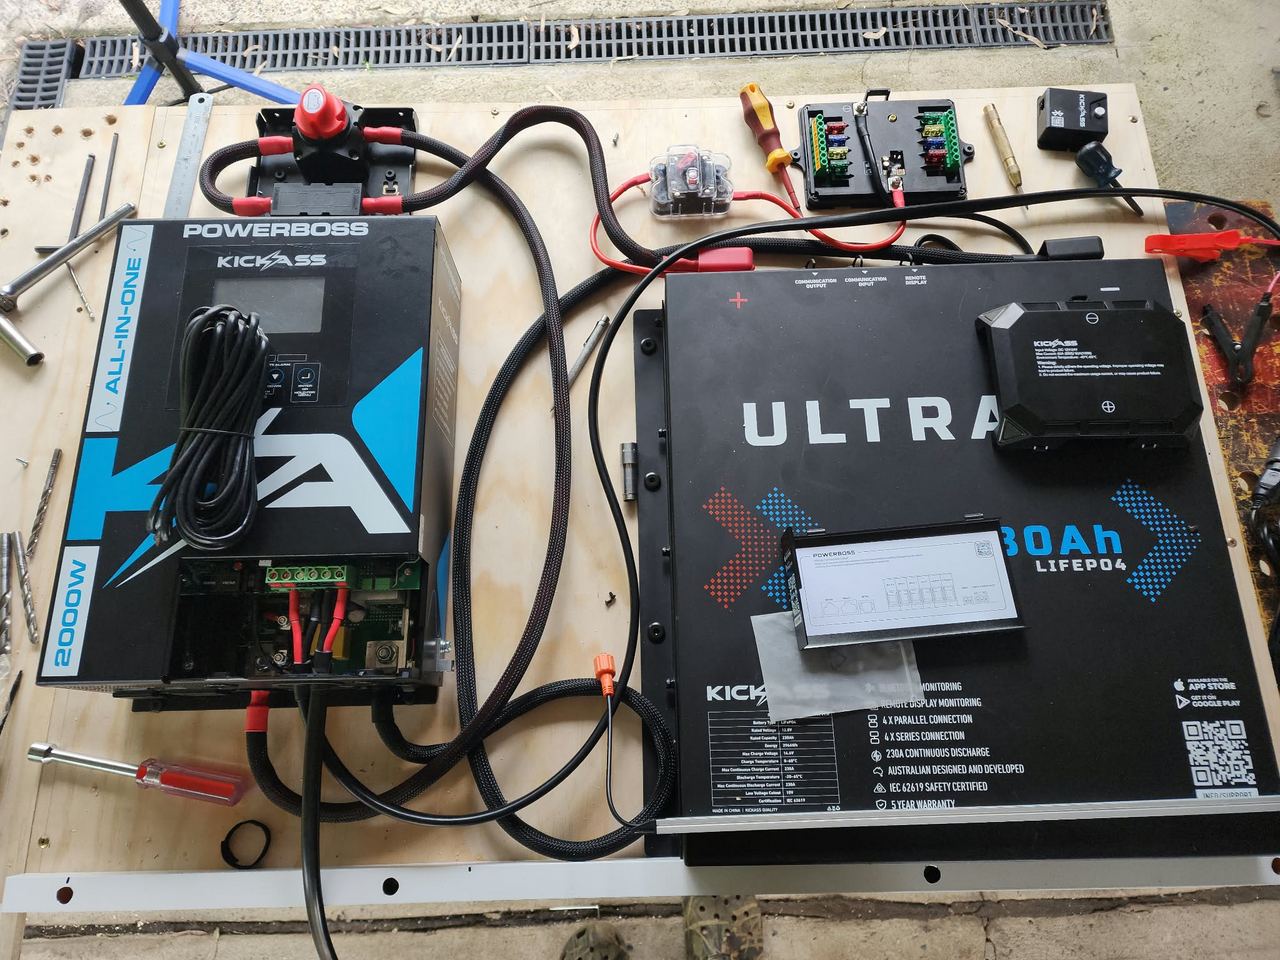
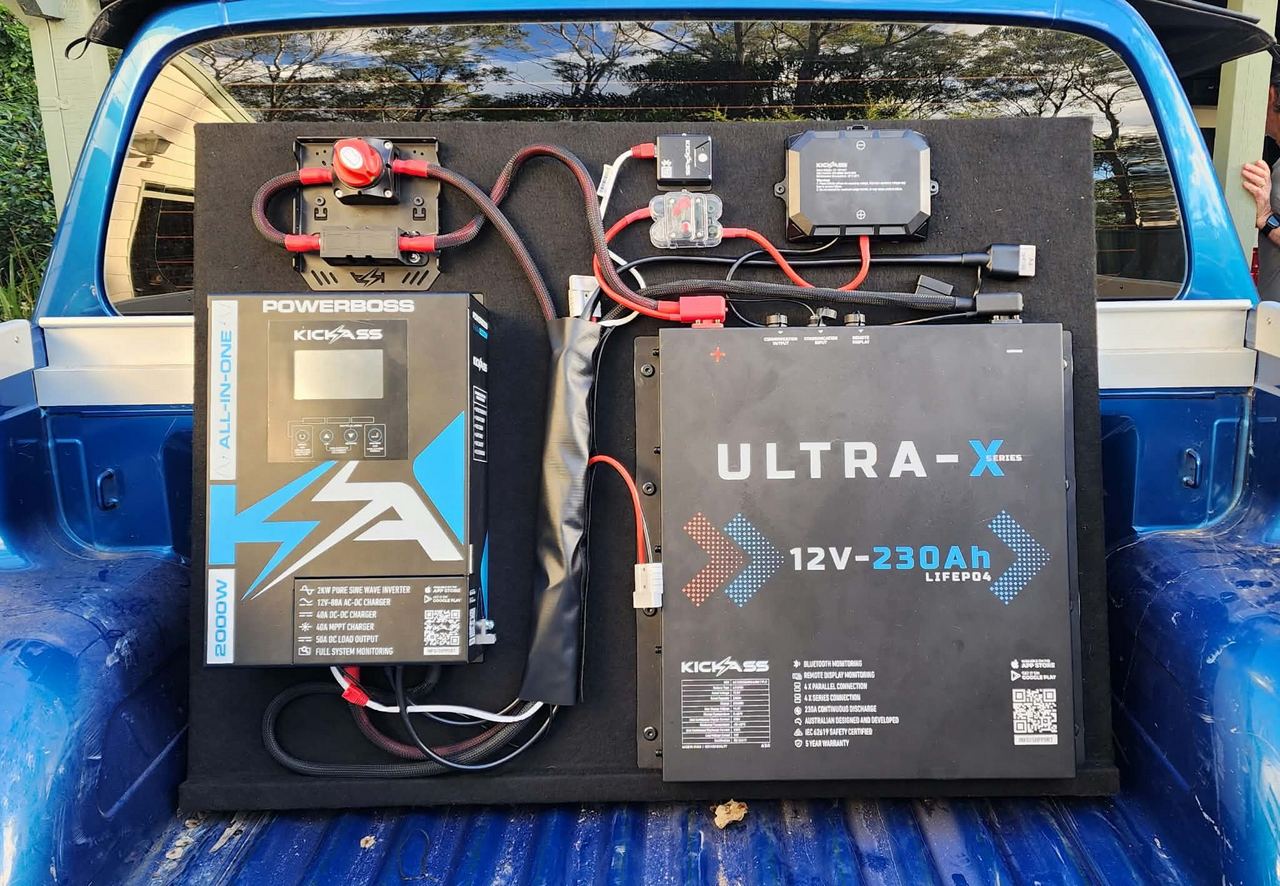
The electrical system is built around a 240Ah LiFePO4 battery, with vehicle charging through DC-DC and both fixed and portable solar available when camped. I have a 160W fixed solar panel as well as a 200W portable solar blanket, which gives me another charging option depending on where the vehicle is parked and where the sun is.
Regular loads include a 70L fridge, Starlink Mini, camp and vehicle lighting, phones and other rechargeable electronics, plus the normal collection of 12V and USB equipment that comes with travelling and camping.
My real-world figures
These are my own observations from my own setup, not specifications.
- Charging while driving: around 550W. In real-world use, I can put roughly 50% back into the 240Ah battery in around two hours of driving.
- Solar: around 400W of capacity across fixed and portable. In good real-world conditions I typically see around 300W of actual input. I don't expect panels to continuously produce their advertised maximum. Output is affected by heat, partial shade, panel positioning, sun angle, cloud and other real-world conditions. The portable solar is particularly useful because I can position it in better sunlight independently of where I've parked the Triton.
- How long it lasts at camp: with reasonable solar available, I can realistically run the normal setup almost indefinitely without needing to start the vehicle just to recharge. Even when it's raining or cloudy and I'm getting only minimal solar recovery each day, I've found the system can last up to around five days before I start becoming concerned about the remaining battery capacity or decide to start the Triton and recharge.
My normal camp loads can include the fridge, freezer, Starlink Mini, lighting at night, phone and device charging, normal 12V and USB equipment and occasional 240V equipment.
In practical terms, the system gives me three layers of energy: the 240Ah battery reserve, around 400W of solar, and approximately 550W of vehicle charging when required. That redundancy is more important to me than relying on ideal advertised performance from any one part of the system.
How I power Starlink Mini
The way I've powered Starlink Mini has evolved over time. For a long time, I simply powered it from the 12V cigarette/accessory socket on the auxiliary battery system. I've also powered it from a portable power bank/power station when that was convenient.
I've now adapted the Starlink Mini to an Anderson connection, allowing it to plug directly into the canopy's auxiliary electrical system. That gives me a cleaner and more permanent connection now that Starlink has become a regular part of the travelling setup.
I don't necessarily leave Starlink running continuously just because it's available. I use it when I need the connection, particularly when I'm somewhere without useful mobile coverage.
Connections and lighting
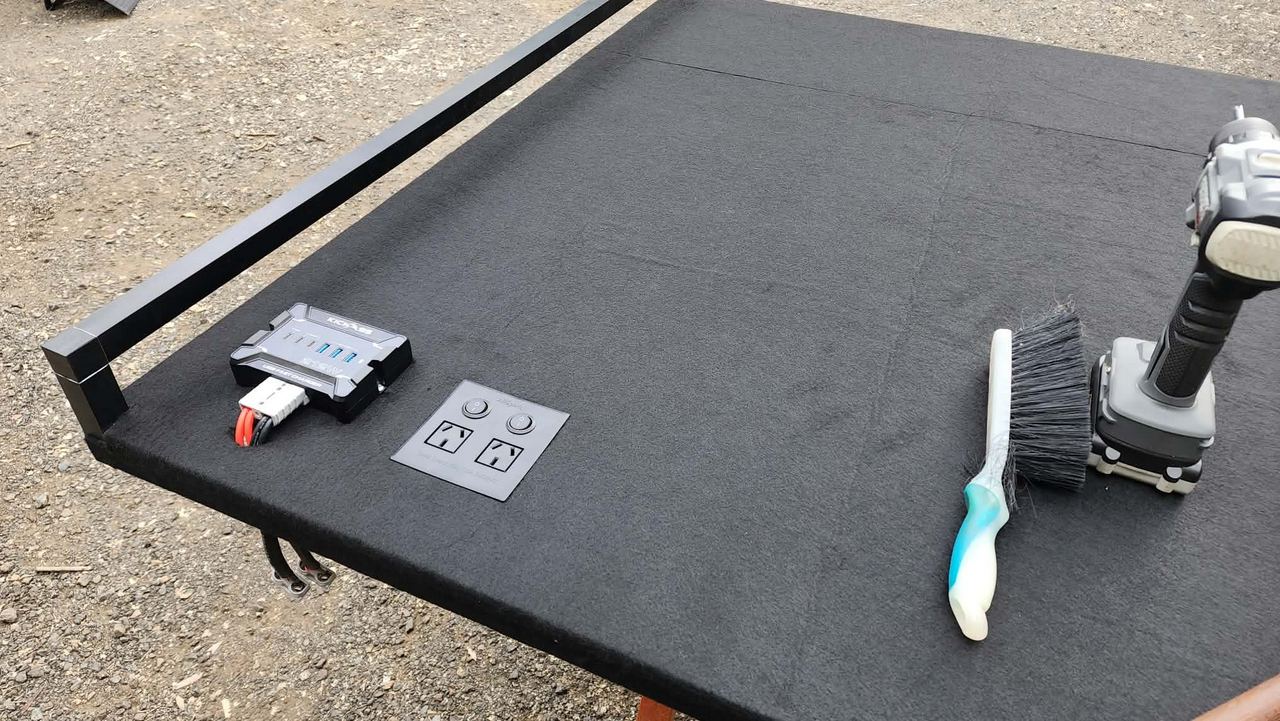
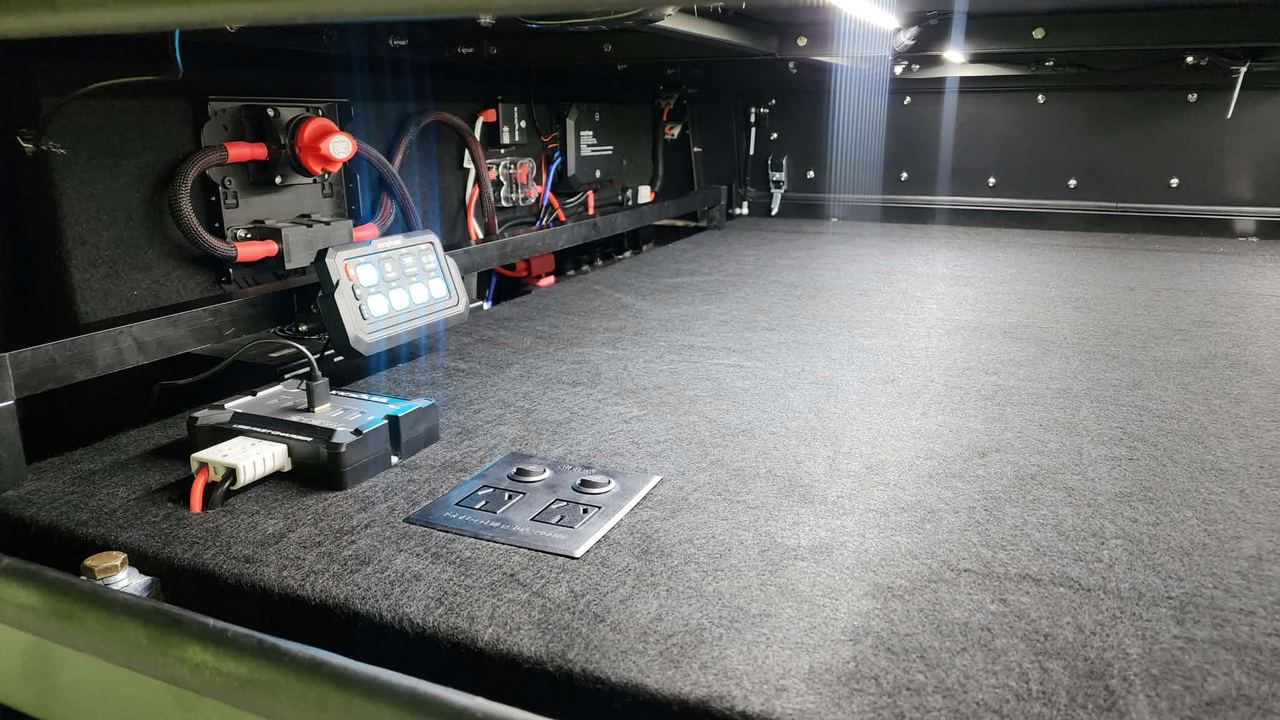
I've built two Anderson ports into the exterior of the canopy for quick connection of solar and suitable external 12V equipment. That means regularly used equipment can be connected without opening up or digging into the main electrical installation every time I'm at camp. I've also built a 240V power point into the canopy shelf for charging and running appropriate 240V equipment through the AC/inverter system.
The electrical setup has evolved around convenience in actual camp use rather than simply looking good on a wiring diagram. I've learned that accessibility matters. Connections and equipment you use regularly should be easy to reach when you're actually camping.
When I started, my camp lighting was basically a 12V lantern and a cheap servo torch. I was so under-equipped when I started this travel journey, but those lessons are what taught me what I needed, what I wanted and, just as importantly, what I didn't want.
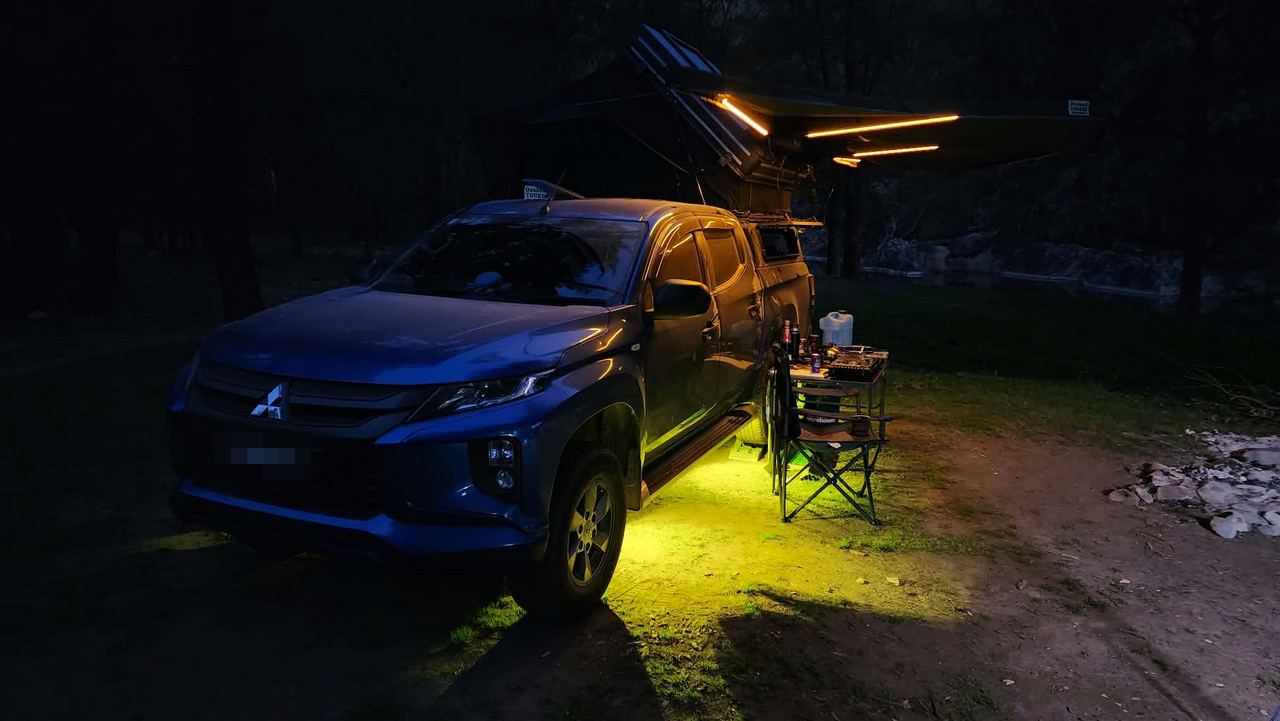
I now have six lights underneath the vehicle that illuminate the ground around the Triton, internal LED lighting in the canopy and lighting underneath the awning. The lighting is controlled through a Bluetooth remote system, and the same remote system also lets me control power to things such as the fridge and Starlink. When I'm at camp I can control the things I regularly use without having to crawl around the canopy looking for switches or disconnecting plugs.
Power is life
If there's one lesson I've taken from travelling and camping, it's probably this: power is life.
Refrigeration, communications, lighting, charging and a lot of the things that make an extended camp comfortable depend on having reliable power. Even with all of my setup, I still never leave home without two portable power banks. They're there just in case.
Experience has taught me that redundancy matters. I don't want one failed connection, one flat battery or several days of terrible weather to automatically mean the trip is over. The goal isn't to have the biggest electrical system possible. It's to have enough capacity and enough different ways of keeping things running that one problem doesn't ruin the trip.
The questions I ask now
When I started, I was trying to make equipment fit into the vehicle. Now I think about how I'm actually going to use it.
- Can I reach the connection easily?
- Can I turn something off without unpacking the canopy?
- Can I charge from more than one source?
- If something fails, do I have another option?
- Can I see what's happening with the battery?
- Can I fix or isolate something while I'm away from home?
Those questions came from actually travelling and making mistakes, not from reading a specification sheet. The current setup isn't the result of getting everything right the first time. It's the result of using the gear, finding the annoying parts, making mistakes and changing things until the setup worked the way I wanted it to.
If you're starting out
If someone asked me what they need to run a fridge and Starlink Mini for a few days of weekend camping, I wouldn't tell them they need to build a permanent auxiliary battery system like mine. You don't.
There are some very capable portable power stations available now from companies like EcoFlow, and even smaller portable power solutions from brands like Anker, that can give someone a very simple way to get started. For a basic setup, I'd look at a portable power station that's properly sized for the fridge, Starlink Mini and device charging, together with some portable solar. That gives you battery storage, charging inputs and useful outputs in one portable unit without having to install a permanent electrical system into the vehicle.
Plug the fridge in, power Starlink as efficiently as you can, put the solar out when you're camped and go enjoy yourself. For a lot of people who just want to get away for weekends or a few days at a time, that may be all they actually need. More importantly, it gets you out camping.
Once you've actually spent some time using the setup, you'll learn very quickly what matters to you. Maybe you need more battery capacity. Maybe you want more solar. Maybe you want charging from the vehicle. Maybe you're perfectly happy with the portable setup and don't need a permanent installation at all.
Don't spend a fortune building somebody else's idea of the perfect setup before you've worked out how you actually camp. If you do start upgrading, vehicle charging would be high on my list because it gives you another way to recover power when the weather isn't cooperating. After that I'd increase battery capacity or solar according to what your own camping actually demands.
And whatever setup you choose, make the things you use regularly easy to access. That's one lesson I learned the hard way.
The one thing I wouldn't camp without
For me, Starlink Mini is a must. That's obviously a personal opinion rather than something everybody needs, but it has changed what being remote means for me. I can be away from normal mobile coverage and still have proper internet access when I need it, for staying in contact, checking weather, maps and information, and, as K'gari showed me, when something actually goes wrong.
I go camping to get out into nature, not to sit on the internet all day. I don't need Starlink running every minute I'm at camp. But knowing I can turn it on when I need communications or information gives me a level of independence and reassurance that I really value.
You don't need to start where I've ended up. My current system came from years of travelling, mistakes, upgrades and learning what I personally wanted. Start simple, get outside, use the gear, and then build the setup that suits the way you actually travel.